Dentanomic Hand Instruments
THE CUTTING EDGE OF VETERINARY DENTISTRY
Dental Instruments Designed by Veterinarians, For Veterinarians.
NEVER ACCEPT A BLUNT INSTRUMENT AGAIN.
Unique modular blades & handles, as solid as a one piece instrument.
Blades release easily for cleaning, honing or replacement, but never unlock during surgery.
How will we make your extractions so much faster?
Our blades are slim enough to fit inside the periodontal space, allowing you to operate directly on the ligament & extracting up to 50% faster.
A Game Changer:"I have been using the Dentanomic range since I opened my surgery last year. I am truly impressed with the practicality and ergonomics of the product. This little tool is an absolute game changer, that makes extractions easier than one can imagine. If you've never tried it, I can wholeheartedly recommend giving it a go: you won't be disappointed." Dr Gabor Nemes, DrMedVet PGCertSAECC MRCVS
|
Dentanomic Blades
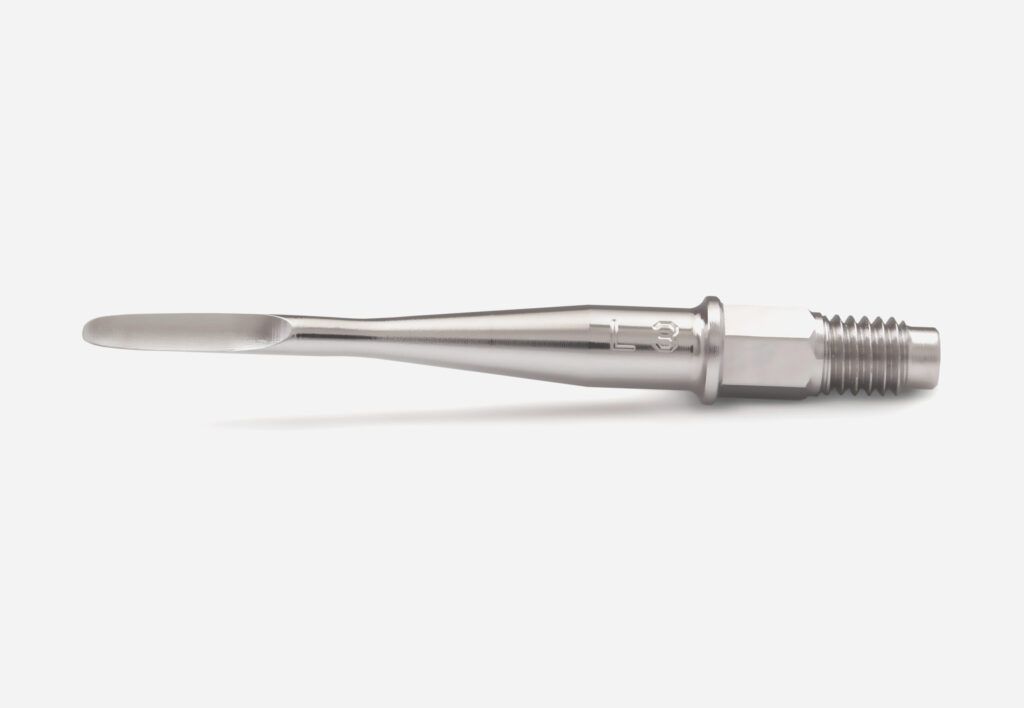
Exerts Less ForceThe periodontal ligament space is 0.1-0.3mm wide. Dentanomic make blades with a thin edge which can access this space. This means that you can use precise surgical techniques, allowing you to exert less force in order to get the job done. Blades are made for two different surgical techniques – elevation and luxation. These work best when used together to complement each other. |
 |
|
|
|
Direct ForceDentanomic elevation blades: The thin edge directs force into the periodontal ligament space. The contoured side and back edges help you apply controlled rotational force. Elevation blades suit a controlled and gentle elevation technique, which reduces the risk of accidental trauma.
|
|
StreamlinedDentanomic luxation blades: Thinner & more streamlined than the elevation blades. They work like a slim, rounded chisel to cut periodontal ligament deep within the periodontal ligament space. luxation blades can be used on all teeth, but are especially useful for thin, fragile roots that can be easily damaged with elevation technique. |
|
CHOOSING YOUR BLADES:
Dentanomic range of 9 blades allows you to undertake the majority of companion animal dental procedures and we recommend that you use all 9.
Start with a blade 1/2 to 2/3 of the diameter of the tooth root. Wider blades exert more force, narrower blades are more precise. When in doubt, gentle is always better!
If you don’t want a full set of blades, try Dentanomic 2mm & 3mm elevation blades and our 2mm luxation blade. That’s a great set for difficult feline teeth and smaller dog teeth.
Dentanomic Handles
Designed By Vets For VetsHandles that fit your hand precisely Ergonomic handles are shaped for the muscles of your hand, giving you precision and control. Palm weighted and balanced with a centre of gravity at the base of your finger, making it easy to use a safe palm grip. |
 |
|
|
|
Size Matters2 handle sizes available to ensure the perfect fit for your hand size Our standard handle will fit your hand beautifully if you have hands up to a 7.5 glove size. If you take size 8 gloves or larger, our long handle will be great for you. Both handles fit all of our blades, so you can choose whichever one is most comfortable for you!
|
All of Dentanomic handles fit all blades – you can choose whichever colour and size you want!
You can choose colours to help you organise your surgical kits, or just pick those colours that you love!
Blade Connection
Perfectly BalancedModular, replaceable blades; as reliable as a one piece instrument. Dentanomic blades are easy to change but will never loosen during surgery. The combination of the collar, hexagonal section and screw thread completely stabilise the blade, giving you perfect surgical feedback. |
 |
|
|
|
Flip A CoinChanging blades is easy and fast. The Dentanomic bolt is operated with a coin slot – you can use the Dentanomic coin (try a loop of bandage to store it on your dental machine if you keep losing it!), or any other coin. Only very gentle tightening of the bolt is needed to secure the blade. The easiest way to secure the blade is to hold the disc still and turn the handle.
|
Dentanomic Accessories
Tidy House, Tidy MindBlade trays to protect your blades during autoclaving and organise them during surgery Storage slots hold blades securely, with space to remove them during surgery. Line your blades up in order to make it easier to pick the right one. Slide on lid protects the blades. Use a standard autoclave bag during autoclaving and for storage. |
 |
|
|
|
Too Hot to HandleHandle trays to protect and organise your Dentanomic handles, bolts and discs. High temperature rubber inserts cushion and protect your Dentanomic handles. Just like Dentanoics blade trays, their handle trays protect your Dentanomic handles, discs and bolts in the autoclave – and they also function as a surgical tray organiser once the lid is removed. Fits a standard autoclave bag for storage.
|
|
Stay SharpHoning kits help you take care of your blade edges. Top quality ultra-fine diamond honing surfaces, in a flat card and cone shape to take care of both concave and convex blade edges. |
|
Techniques & Training
Safe Hand HoldDentanomic instruments are balanced for a safe palm grip. Use their smaller handle if your surgical glove size is 7.5 or smaller. Their longer handle will be perfect for you if your glove size is 8 or larger. When you choose the right handle, the blade tip should rest just past the end of your index finger (this forms a finger stop, preventing the blade injuring your patient when you slip). |
 |
|
|
|
Double Finger StopYour finger resting near the blade end forms a finger stop – preventing you slipping and causing damage. For difficult unstable areas, try a double finger stop. Use the index finger of your free hand to stabilise the index finger of your working hand. This gives you more control. |
Elevation Technique
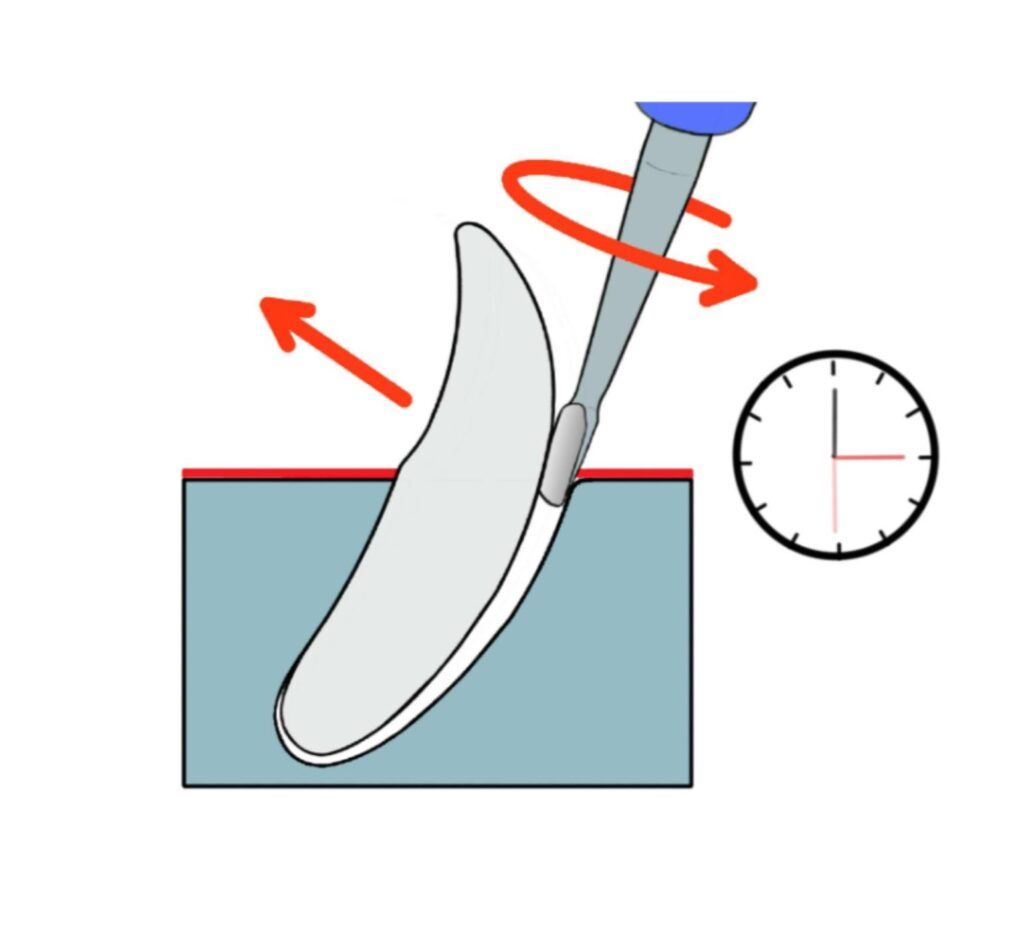
Rotational ForceElevation Technique Elevation is all about applying controlled rotational force over a period of time. This technique stretches ligament fibres, which takes time. Do not use rapid or forced levering movements.
|
 |
|
|
|
Using ForceElevation is a more forceful technique which puts more strain on tooth roots and bone. There is a risk of tooth and bone fracture, especially if the instrument is rotated forcefully or quickly. Elevation is most appropriate for thicker or stronger roots – but it can be combined effectively to complement luxation technique. Rapidly rocking or rotating blades backwards and forwards will quickly & severely damage the thin blade edge. |
Luxation Technique
Cut The LigamentLuxation Technique Luxation is all about working a thin, sharp blade into the periodontal ligament space to cut ligament.
|
 |
|
|
|
Using ForceLuxation is a more precise surgical technique than elevation. It is most appropriate for thinner or weaker roots – but it can be combined effectively to complement elevation technique. Luxation blades are very thin and sharp. A palm grip and finger stop are vital to prevent accidental trauma. Using luxation blades as levers or elevators will quickly & severely damage the thin blade edge. |
Care & Cleaning Guide
Clean DesignDentanomic instruments are easy to clean and sterilise. Don’t forget their autoclave trays make it easy to keep track of everything during the cleaning cycle and prevent scratches & damage.
|
 |
|
|
|
|
|
HoningSharpening implies re-engineering of a blunt blade edge. Honing is a more gentle frequent technique which will maintain the sharp edges on your blades. Gentle honing makes your blades last longer – but honing with a bad technique might blunt your blades so be careful. Honing should be a daily procedure and is best done as part of your cleaning protocol. Honing straightens and realigns the very thin edges of your Dentanomic blades, keeping them sharp and effective. |
|
|
 |
|
|
Dont Do This!Our most common cleaning problem. Our handles are made from high grade aluminium. The protective anodised finish can be stripped off if alkaline cleaning solutions are used. Check that your cleaning solutions are suitable for steel and aluminium. Occasionally tap water can be very alkaline – this can be resolved by using distilled (deionised water) for cleaning instruments. Spotting on blades or trays is most commonly caused by chloride deposits from tap water. Use distilled water for cleaning and rinsing to prevent this. |
 |


